Part of having a collaborative workspace is the ability to upload and share files. The Team Workspace organizer has the ability to set the file upload permissions for their workspace. They can allow anyone to upload files, only allow authorized users (people who log in) to upload or limit file uploads to just themselves. However, anyone who particpates in the Team Workspace can download any files that are shared. NOTE: Files shared in the Team Workspaces area count against the total space used for every participant that's also a user on the domain of the workspace organizer.
Setting File Upload Permissions
The Workspace organizer has the ability to set permissions for the types of attendees that can upload shared files. This is done in the Settings area:
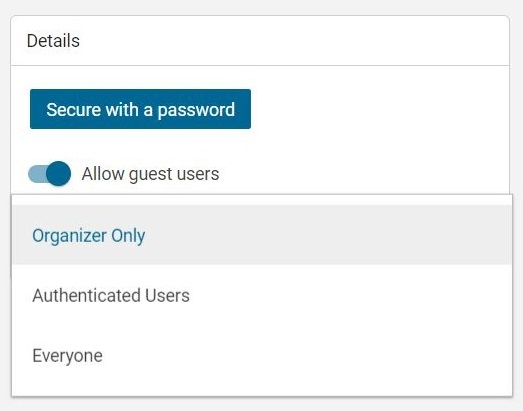
The options for setting attendee file upload permissions inclucde:
- Organizer Only - The only person who can upload files to a team workspace is the user who set up the team workspace in the first place.
- Authenticated Users - Attendees who log into the team workspace are able to upload files; guests can not upload.
- Everyone - All attendees are able to upload files as needed.
Uploading and Sharing Files
Once permissions are set, it's time to upload and share some files. A few quick things to note:
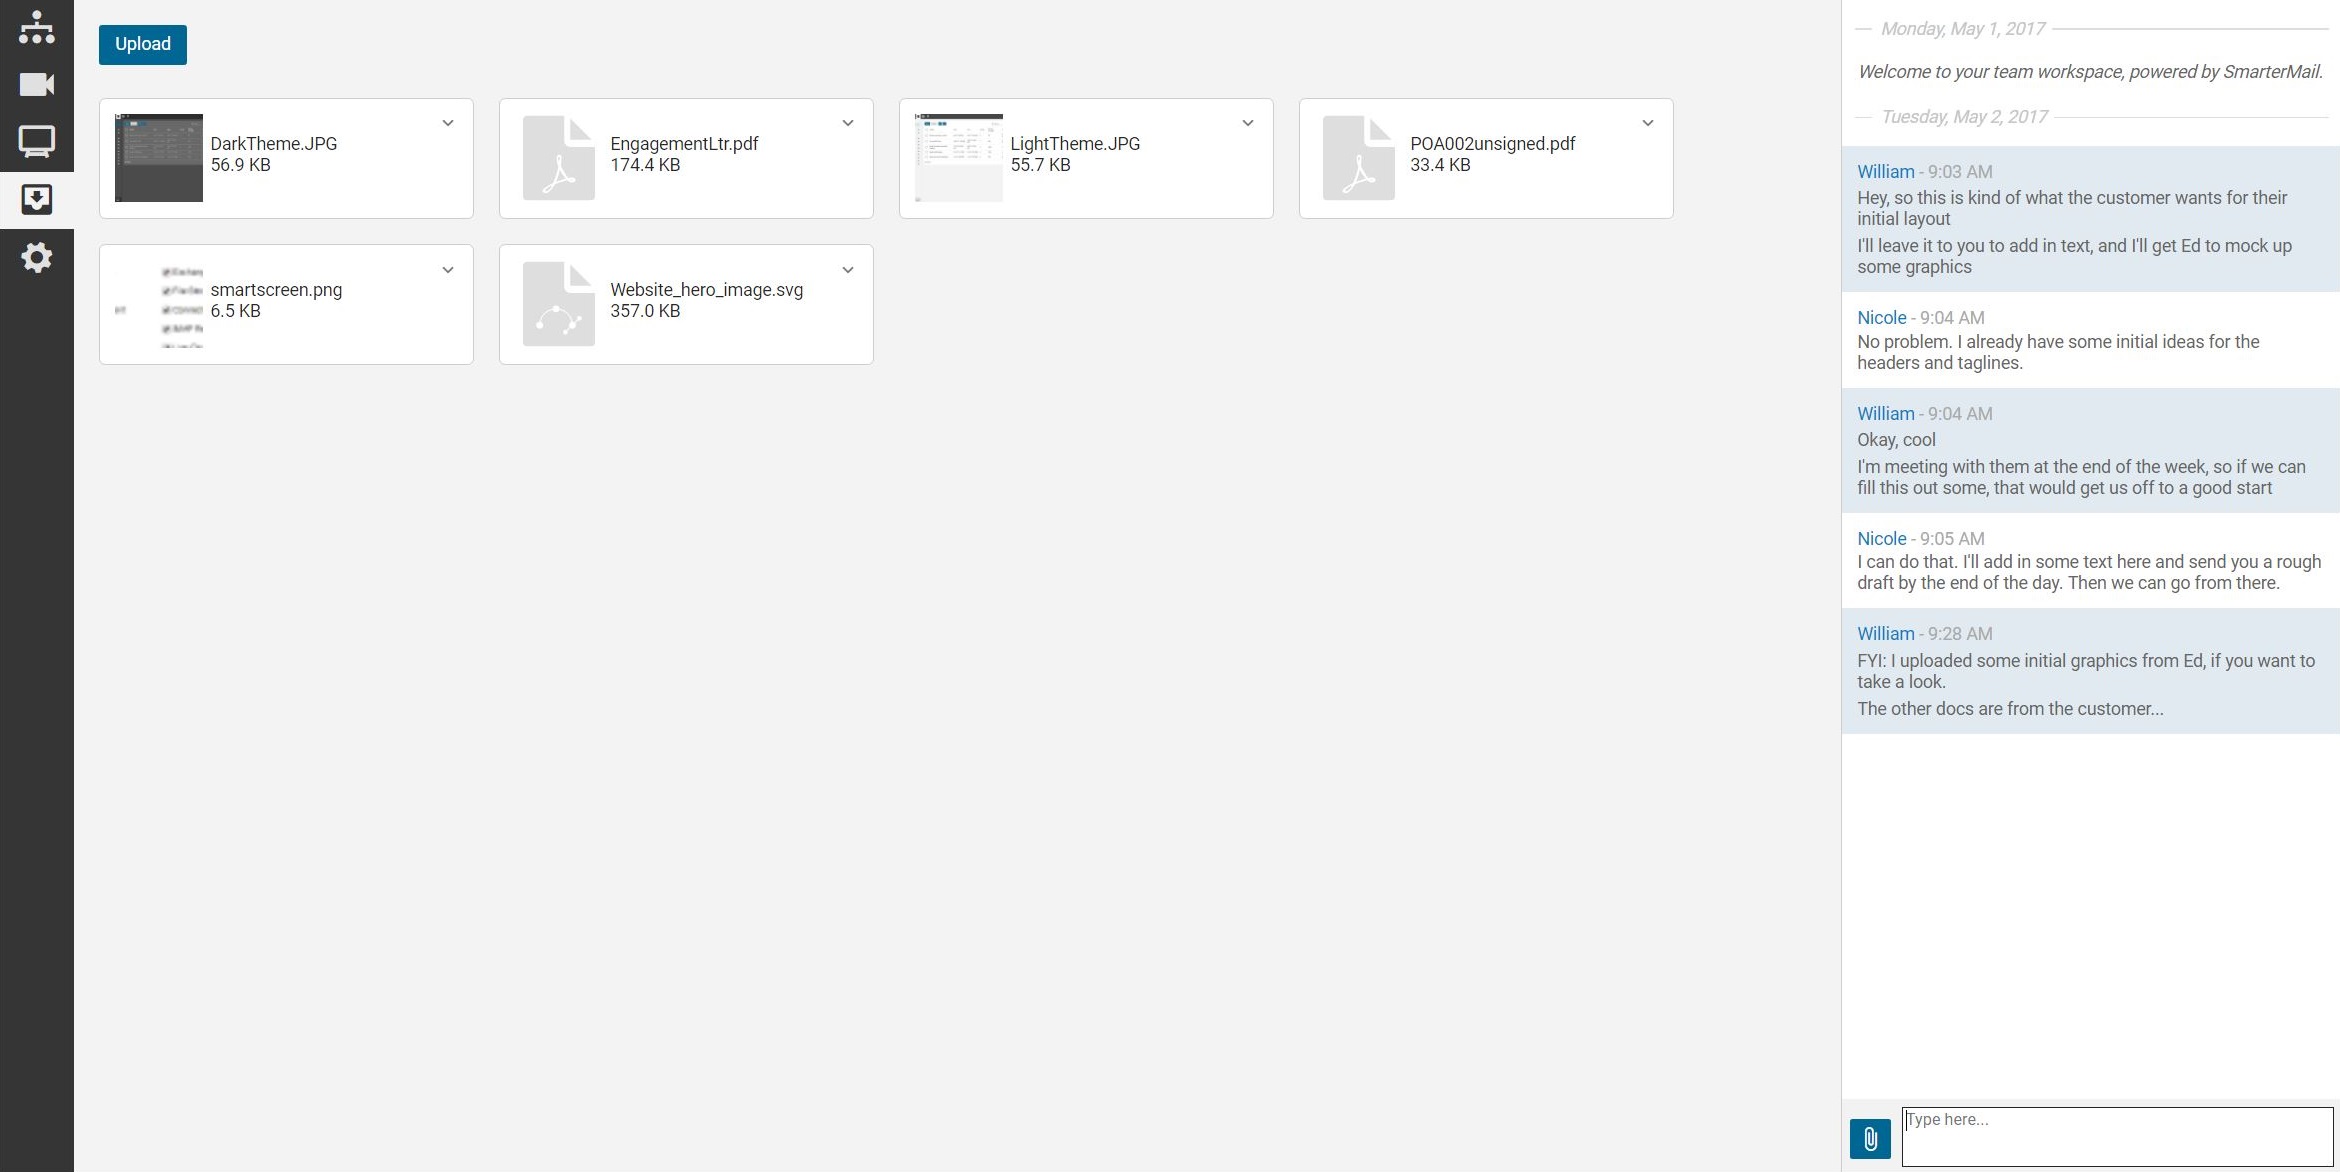
- By default, files shared are sorted alphabetically by file name.
- Just as with the File Storage area, whenever possible a thumbnail of the file will be displayed. If a thumbnail can't be displayed, then an icon representing the file type will be displayed.
- Shared files will show the file name and the file size on their respective cards.
- Clicking on the Caret allows attendees to either download or delete each file.
As for actually uploading files, there are a few ways to do this:
- Drag and Drop - You can drag and drop files in either the upload area OR in the group chat area. In either case, files will be uploaded to the workspace and displayed in the upload area. Files dropped into the Group Chat area will also display a download link, just as they do in a regular Group Chat.
- Upload/Attach Buttons - You can also use the Upload button in the upload area OR use the Attachment button (the paper clip) in the Group Chat area to upload files. Clicking either of these buttons will open your File Explorer (or similar) and allow you to choose a file to upload. Simply select the file and click the Open button to upload it.
Downloading or Deleting Shared Files
Each file that's shared in a team workspace has its own card. Each card, in turn, has a Caret in the upper, right corner. Clicking on that card gives a participant the ability to download that particular file. In addition, a participant can delete the file, should they choose to.
Also See: Team Work Spaces KB's Email Settings POP3 / IMAP | Check email online | Email Troubleshooting | Adding an email to your hosting account WINDOWS / LINUX
Contact Support
If you are still having issues, please contact us for further help.
1-877-EPHOST1 | support@ephost.com
