Setting Up your hosted EPhost Email On Your Android can be done within a few steps with these instructions.
Access the Mail application on an Android device can be done in a couple of different ways. This is only one way to create and email account.
JUMP TO SECTION [Word Instructions] | [Picture Instructions] | [Modify TLS/SSL]
ACCESSING ACCOUNTS on a Google Android Device
- Open the 'Settings Page', by swiping from the top of the screen downwards. A Gear will appear in the upper right corner, TAP the Gear
- On the 'Settings Page' scroll down until you see 'Accounts' and TAP it
- On the 'Accounts Page', there will be an item called 'Add Account', TAP that
ADDING THE ACCOUNT - From this point forward it's a series of Q&A's, answer the question on the screens
- Add the Type of Account, scroll down until you see 'Personal (IMAP)' and TAP it NOTE: Usually there is the Google Mail Icon next to it.
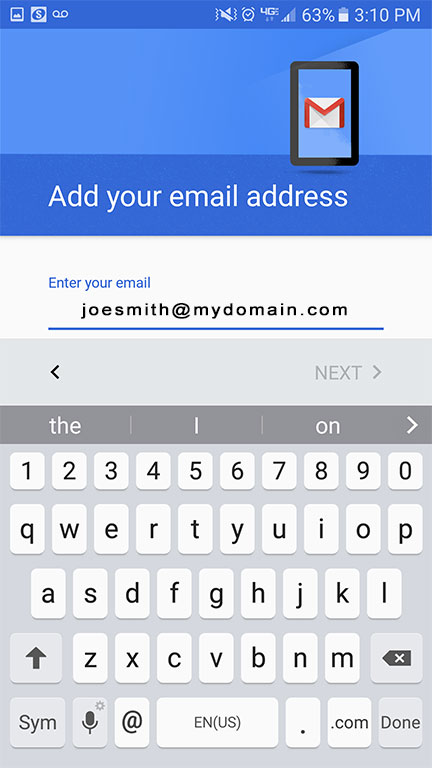
- "Add your email Address"
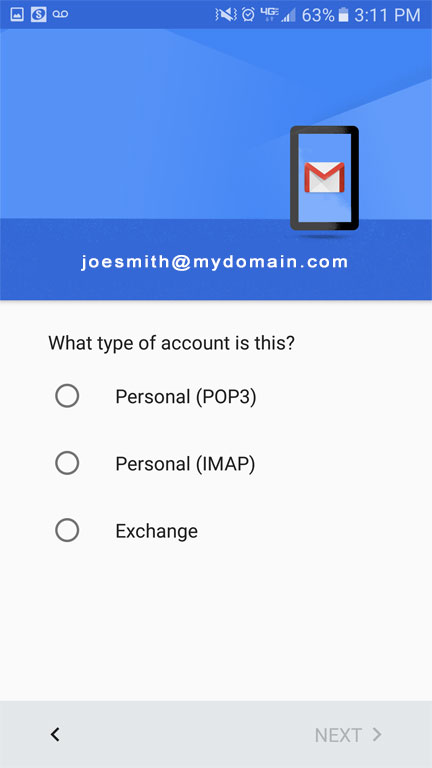
- Choose the type of Account (POP3/IMAP), we suggest IMAP, TAP NEXT
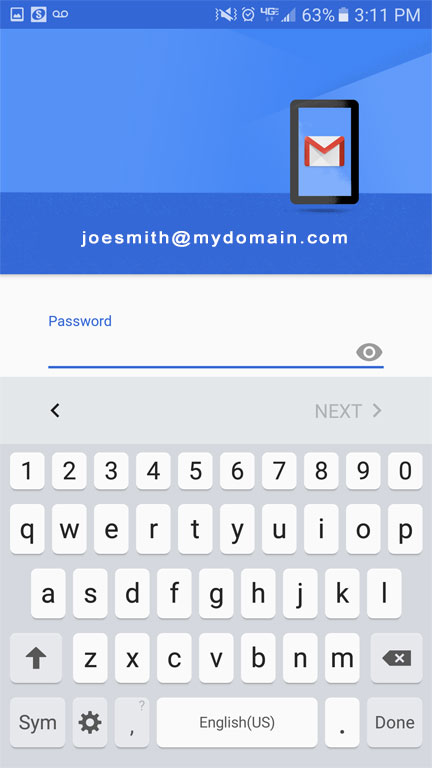
- Enter your password for the account, TAP NEXT
- 'Incoming Server settings' screen, enter 'mail.ephost.com', TAP NEXT
- 'Outgoing Server settings' screen, enter 'ephost.com', TAP NEXT NOTE: normally it would be 'mail.ephost.com', try both, if the device truncates it to just 'ephost.com' it should still work. TAP NEXT
- 'Account Options' Page will give you the following options on how often you wish to sync with the server
- Notify me when email arrives
- Sync email from this account
- Automatically download attachments when connected to Wi-FI (good setting if you have a limited data plan)
- TAP NEXT
- The final screen should say "Your account is set up and email is on its way!" TAP NEXT
NOTE: There is no need to set up for SSL/TLS, most Android Devices "ASSUME" you will be connecting through SSL/TLS and use those ports during setup.
PICTURE INSTRUCTIONS
Access the Mail application on an Android device can be done in a couple of different ways. This is only one way to create and email account.
ACCESSING ACCOUNTS on a Google Android Device
- Open the 'Settings Page', by swiping from the top of the screen downwards. A Gear will appear in the upper right corner, TAP the Gear
- On the 'Settings Page' scroll down until you see 'Accounts' and TAP it
- On the 'Accounts Page', there will be an item called 'Add Account', TAP that
ADDING THE ACCOUNT - From this point forward it's a series of Q&A's, answer the question on the screens
STEP 1 - ADD THE TYPE OF ACCOUNT
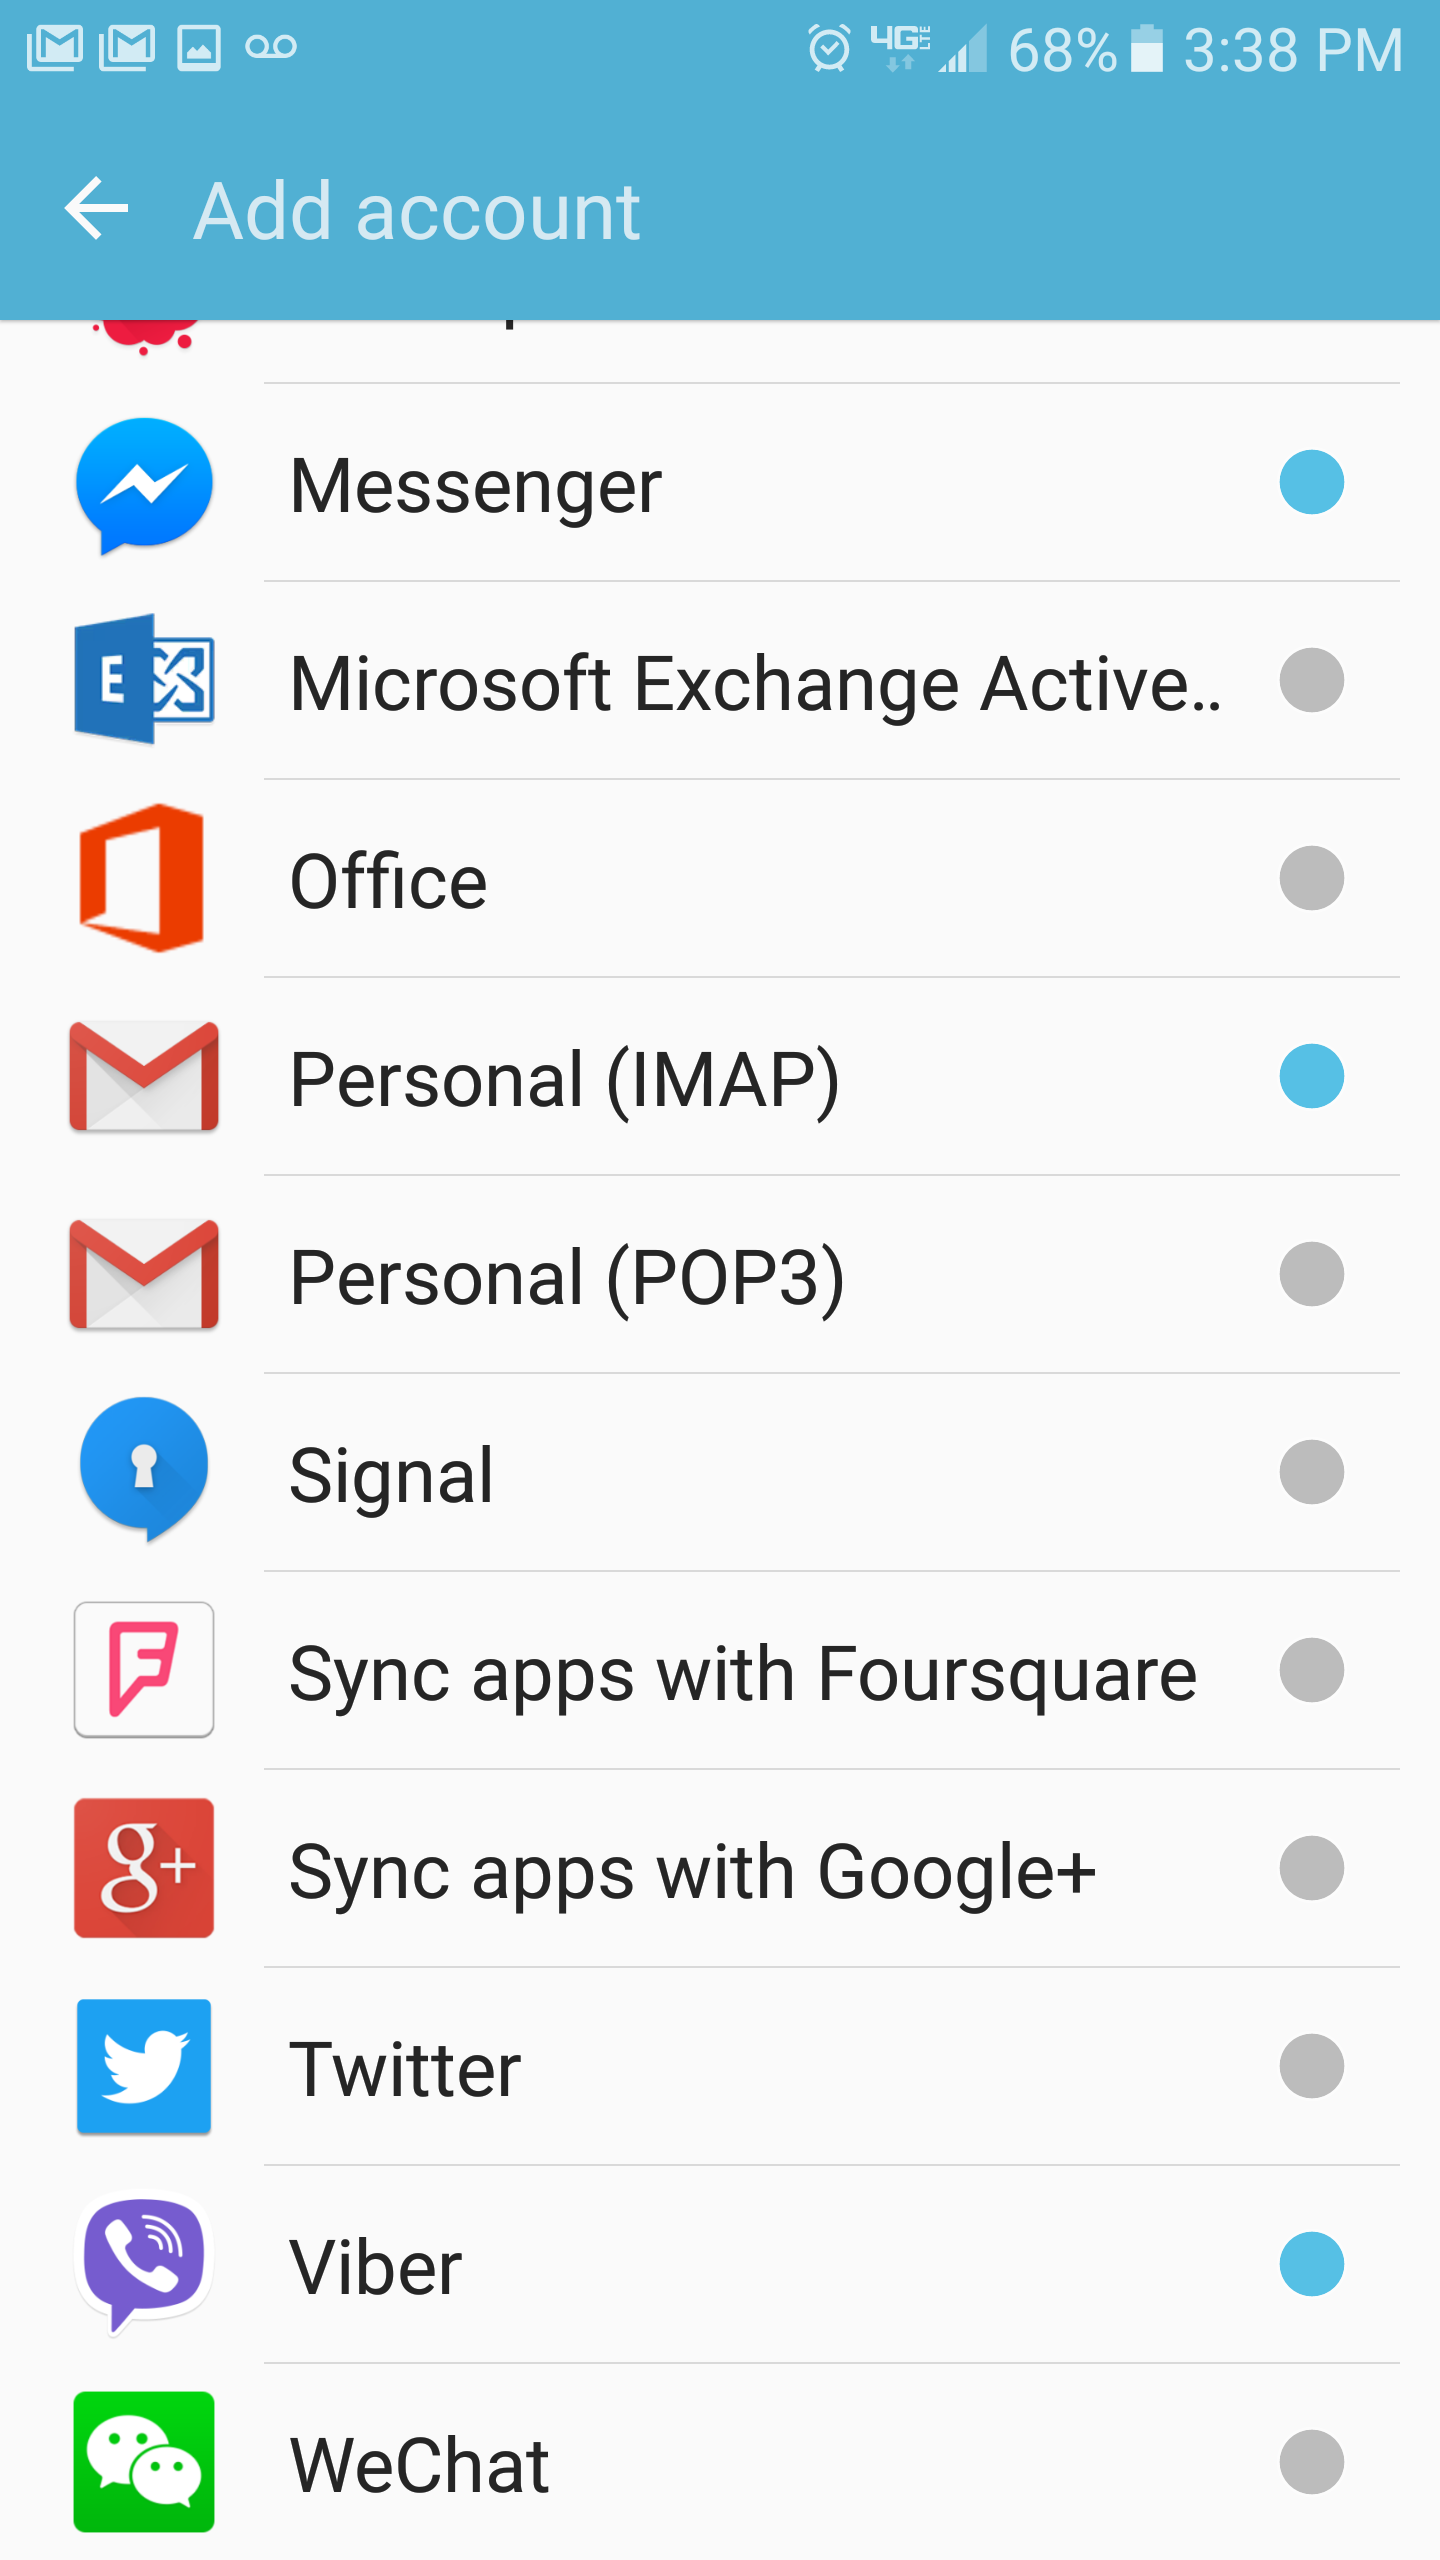
Add the Type of Account, scroll down until you see 'Personal (IMAP)' and TAP it NOTE: Usually there is the Google Mail Icon next to it.
STEP 2 - "Add your email Address"
STEP - 3 Choose the type of Account (POP3/IMAP), we suggest IMAP, TAP NEXT
STEP 4 - Enter your password for the account, TAP NEXT
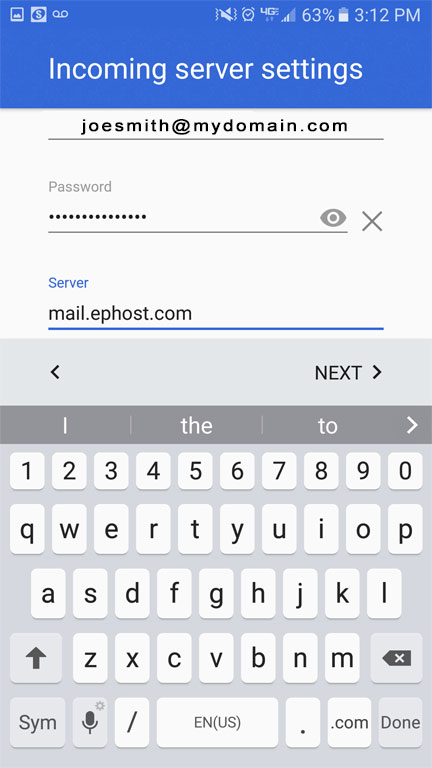
STEP 5 - 'Incoming Server settings' screen, enter 'mail.ephost.com', TAP NEXT
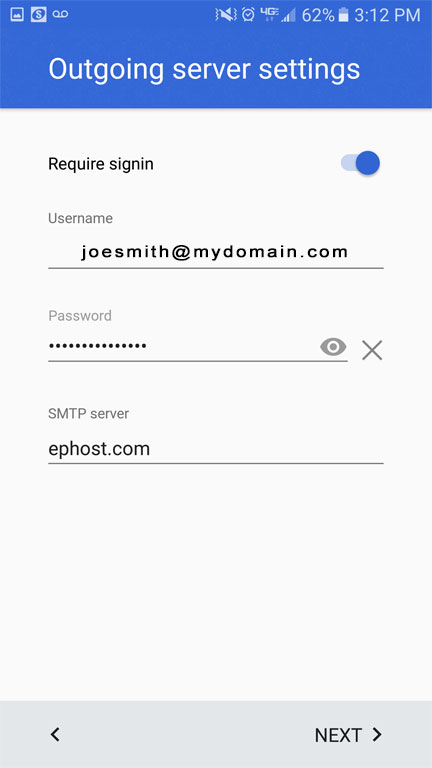
Step 6 - 'Outgoing Server settings' screen, enter 'ephost.com', TAP NEXT NOTE: normally it would be 'mail.ephost.com', try both, if the device truncates it to just 'ephost.com' it should still work. TAP NEXT
STEP 7 - 'Account Options' Page will give you the following options on how often you wish to sync with the server
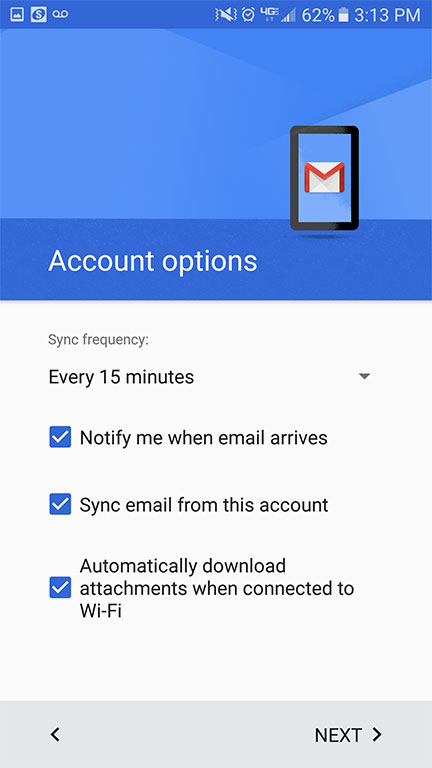
- Notify me when email arrives
- Sync email from this account
- Automatically download attachments when connected to Wi-FI (good setting if you have a limited data plan)
STEP 8 - TAP NEXT
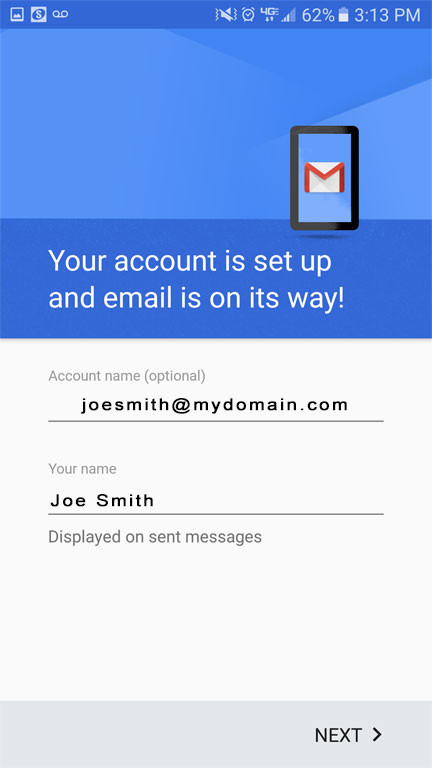
The final screen should say "Your account is set up and email is on its way!" TAP NEXT
NOTE: There is no need to set up for SSL/TLS, most Android Devices "ASSUME" you will be connecting through SSL/TLS and use those ports during setup.
I DON'T TRUST MY PHONE, HOW CAN I MAKE SURE IT IS USING SSL/TLS?
- Go Back to the Account page by following Steps 1-3 above in the 'ACCESSING ACCOUNTS'
- TAP on the 'Personal (IMAP)' Option
- TAP on the 'Account settings'
- TAP on Account you wish to modify (if you have more than one)
- Scroll down to the section called 'Server Settings' (TAP on the setting you wish to look at or modify
- Incoming Settings (should be these settings)
- Server: mail.ephost.com
- Port: 993
- Security Type: SSL/TLS
- Outgoing Settings (should be these settings)
- SMTP Server: mail.ephost.com
- Port: 465
- Security Type: SSL/TLS
- Incoming Settings (should be these settings)
Also See: Push Email Sync KBs | Email Settings POP3 / IMAP | Check email online | Email Troubleshooting | Adding an email to your hosting account WINDOWS / LINUX
Contact Support
If you are still having issues, please contact us for further help.
1-877-EPHOST1 | support@ephost.com


